

24
2020
HOW TO CREATE A SOCIAL MEDIA CHALLENGE
 Hey, cuties (and Minnies) welcome back to #MidweekMagic, where we share fun Disney finds for you to shop … BUT TODAY we’re doing something different. I’ll be giving you all the info on how to create an impactful social media challenge that your community will engage with (precisely a Disney challenge)! Yay! Plus, I’ll be sharing shoppable Disney finds & announcing our new theme of the week.
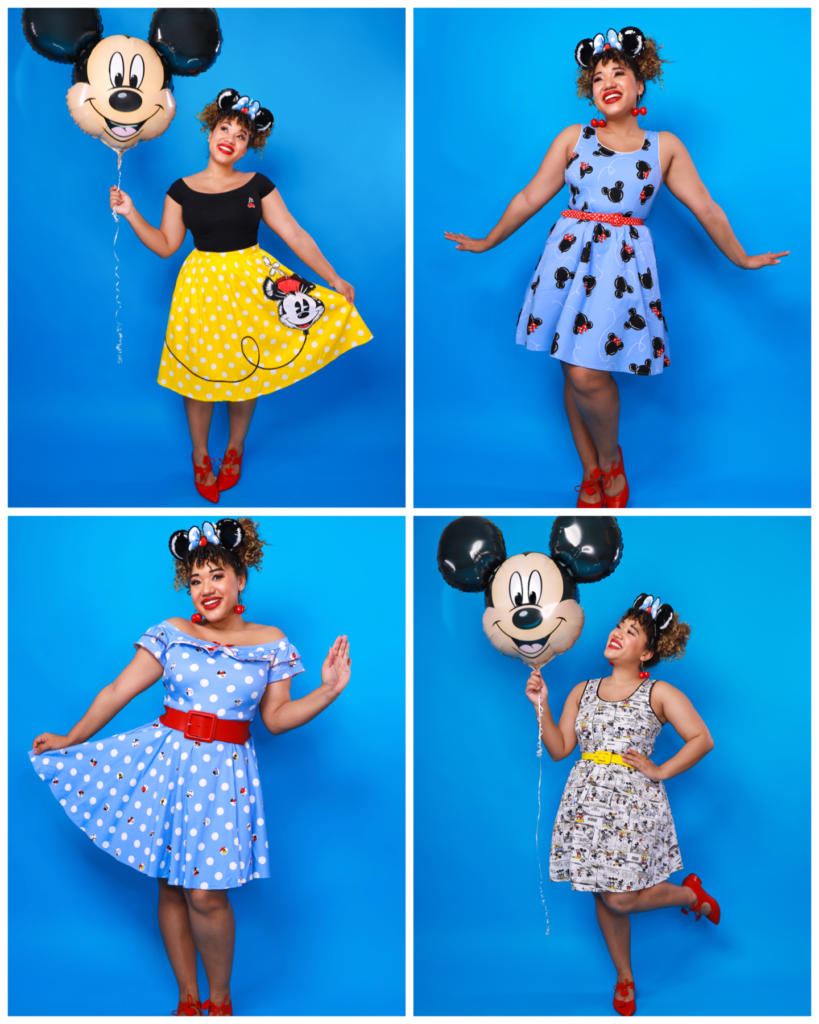
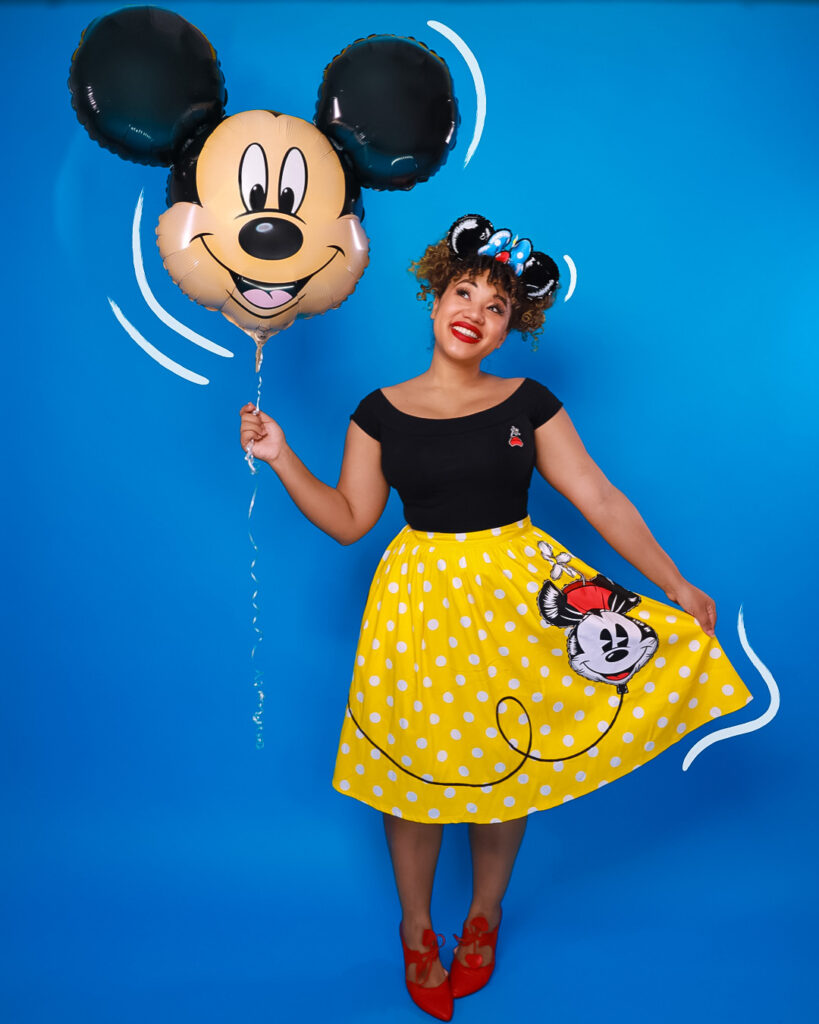
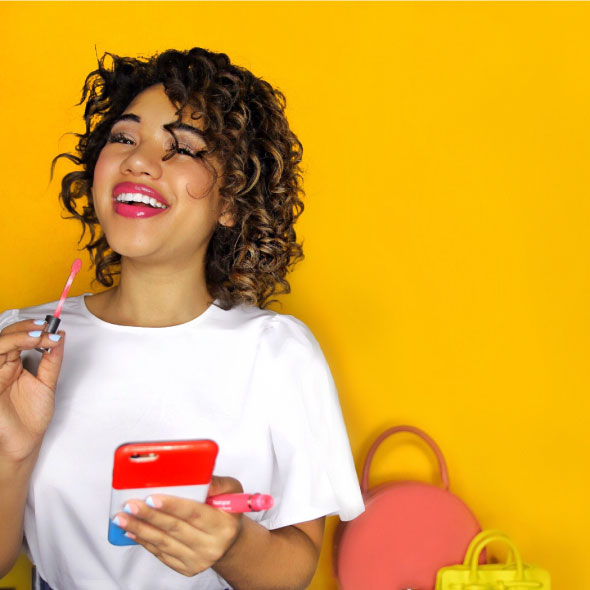
Wearing: Stitch Shoppe By Loungefly (available here & here) || cherry earrings || red belt (also here)|| Red flats || Yellow belt (also here)
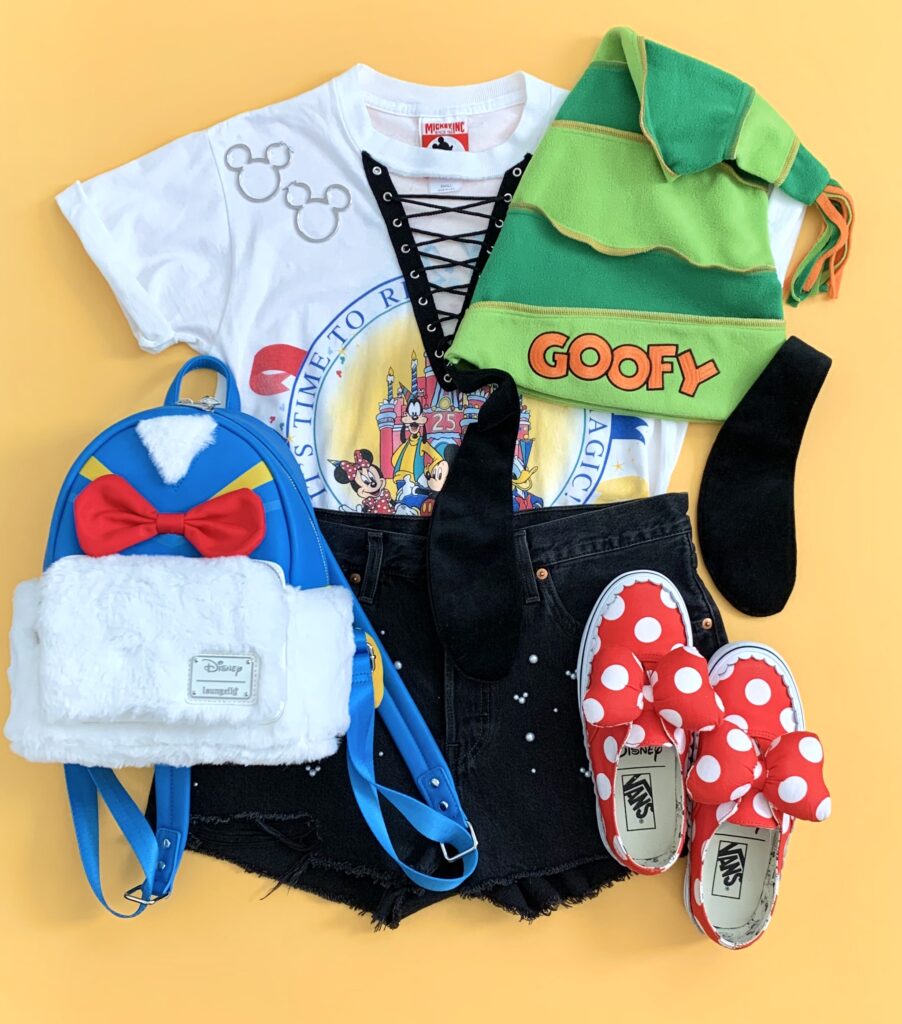
Lace Up Shirt || Denim Shorts || Goofy Ears || Earrings
Backpack || Vans
THEME OF THE WEEK:
Every week (Wednesday to Wednesday), we launch a new theme on color me magic. Let weeks theme was MICKEY & FRIENDS, and this week’s theme is POKEMON!!!! I’ve been recently obsessed with Pokemon watching every episode ever in quarantine (there’s like 600 episodes lol), so I had to do a Pokemon week, wee!!!!
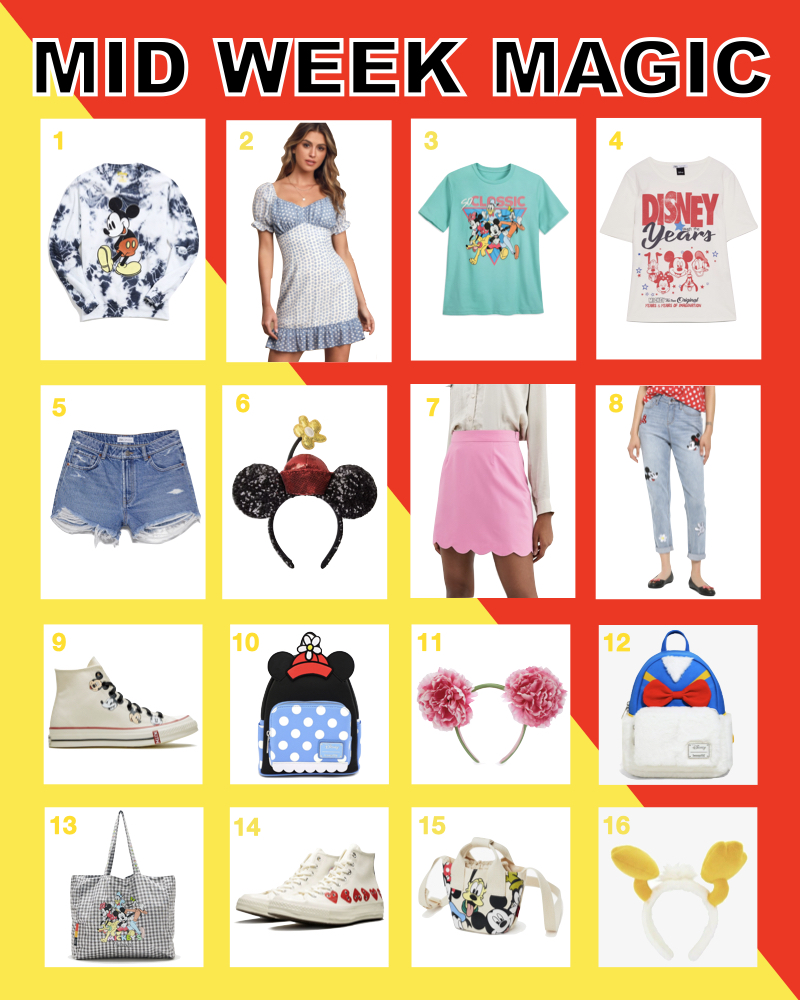
ONE : Tie-Dye Crew Neck || TWO : Dress || THREE : Mickey & Friends T-Shirt
FOUR : Mickey Mouse T-Shirt || FIVE : A-Line Ripped Denim Shorts || SIX : Headband
SEVEN : Skirt || EIGHT : Mickey Denim || NINE : Kith x Converse Sneakers
TEN : Minnie Mouse Backpack || ELEVEN : Floral Headband
TWELVE : Donald Duck Backpack || THIRTEEN : Shoulder Tote
FOURTEEN : CDG x Converse Sneakers
FIFTEEN : Crossbody Bag || SIXTEEN : Donald Duck Ears
Dress (2-6) || Belt || Earrings ||Backpack || Wallet || Headband || Sneakers
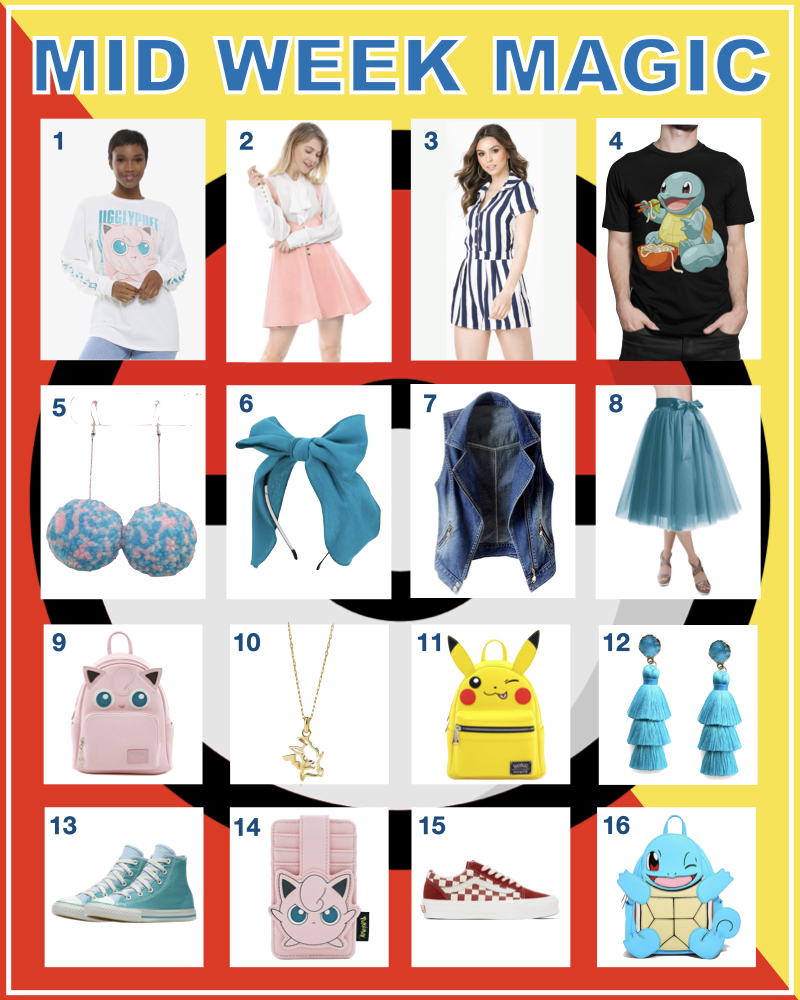
ONE : T-Shirt || TWO : Pinafore Skirt || THREE : Striped Romper
FOUR : Squirtle T-Shirt || FIVE : Earrings || SIX : Headband
SEVEN : Denim Vest || EIGHT : Tulle Skirt || NINE : Jiggly Puff Backpack
TEN : Necklace || ELEVEN : Pikachu Backpack || TWELVE : Tassel Earrings
THIRTEEN : Converse || FOURTEEN : Jiggly Puff Wallet
FIFTEEN : Vans || SIXTEEN : Squirtle Backpack
MORE POKEMON!!!
Black Nike Pokemon Sweatshirt (shirt here) || Pink Sweatshirt
Blue crane shirt (+more colors) || squirtle backpack || jigglypuff backpack
Pink mask || yellow pikachu mask || pikachu backpack
mean pikachu shirt || charizard pikachu plus || bolt earrings
HOW TO HOST A DISNEY CHALLENGE:
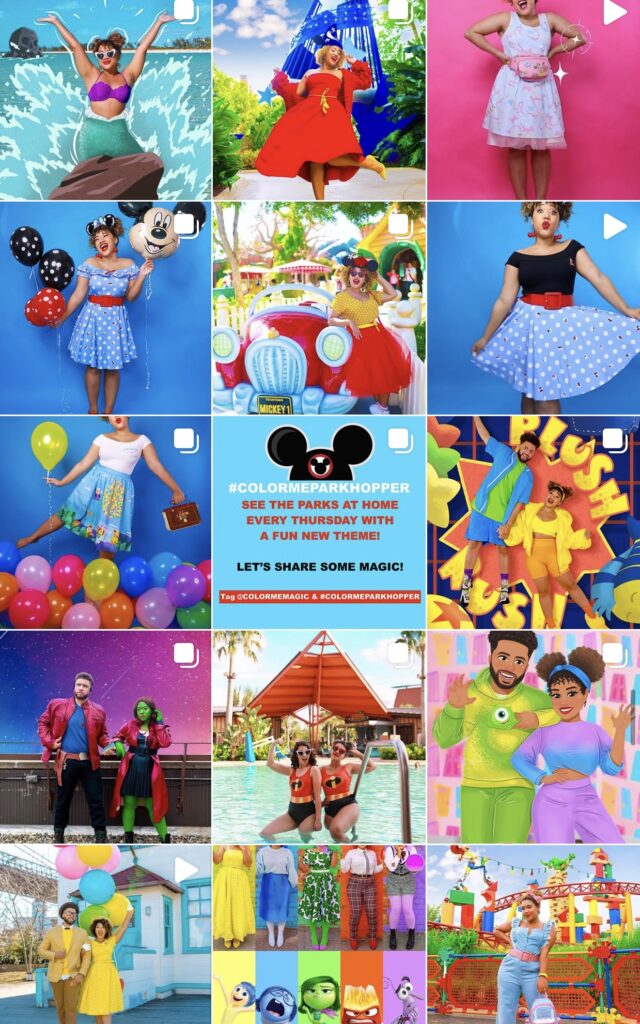
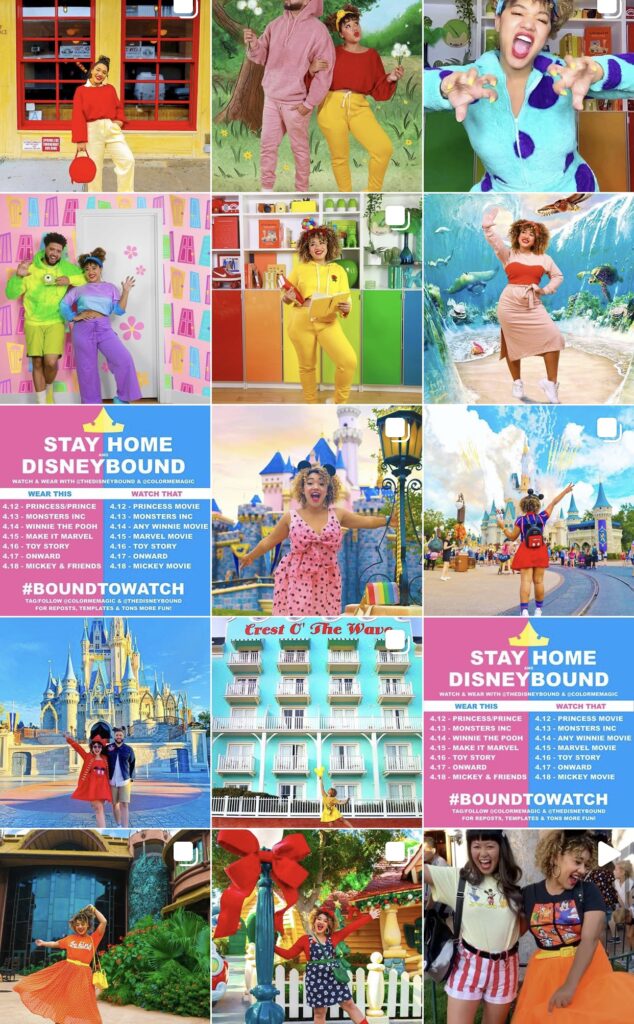
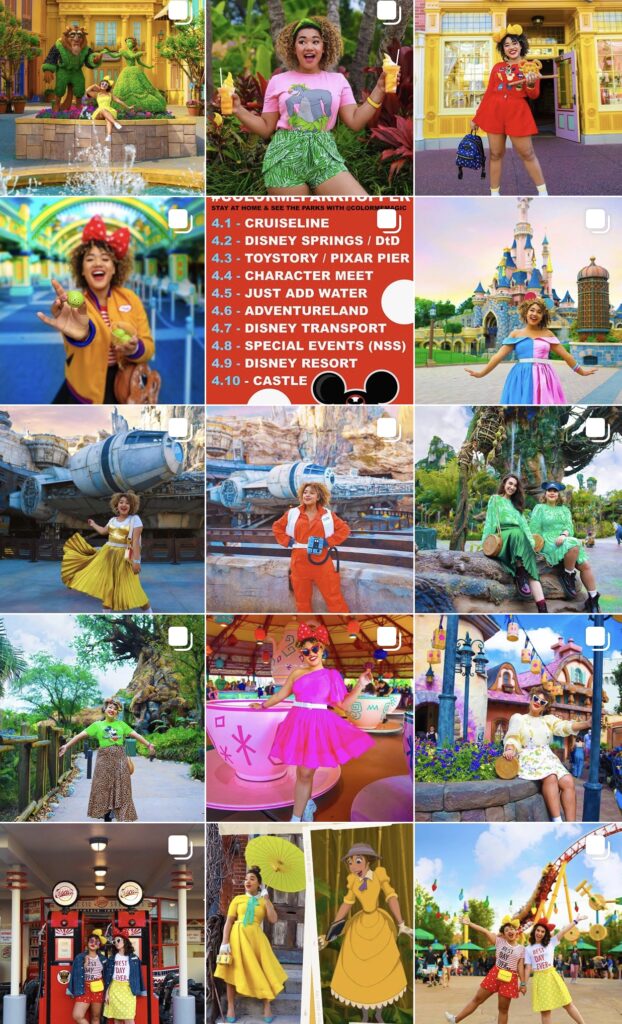
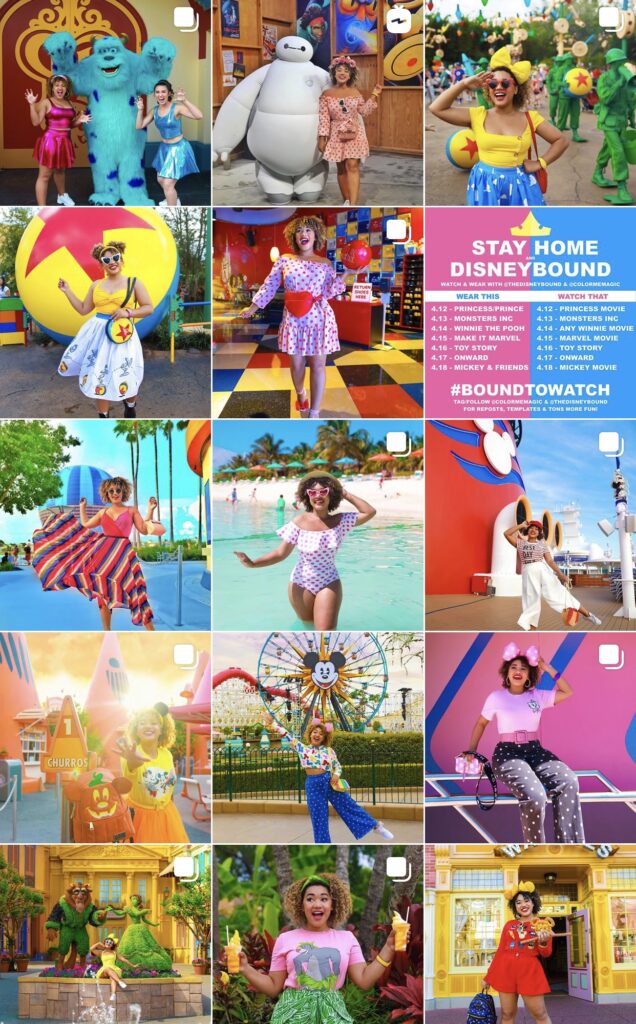
MY CHALLENGES: On my account @colormemagic, I’ve hosted 5 Disney challenges and organized quite a few “Disney projects” We did #colormehalloween & #colormevalentine which were 15-day challenges with fun dress up prompts and themes, 2 rounds of#colormeparkhopper that was a virtual park challenge narrating over 15K posts and still continues every Thursday, and #boundtowatch with @thedisneybound. Most of these social media challenges have been based on the model that @thedisneybound set up with her march Disney bound challenges! Every day has a new prompt for people to dress up and post about. Now that I’ve done 5 of these, I wanted to share everything I learned to help you guys.
STEP 1: PICK A CLEAR AND RELEVANT THEME:
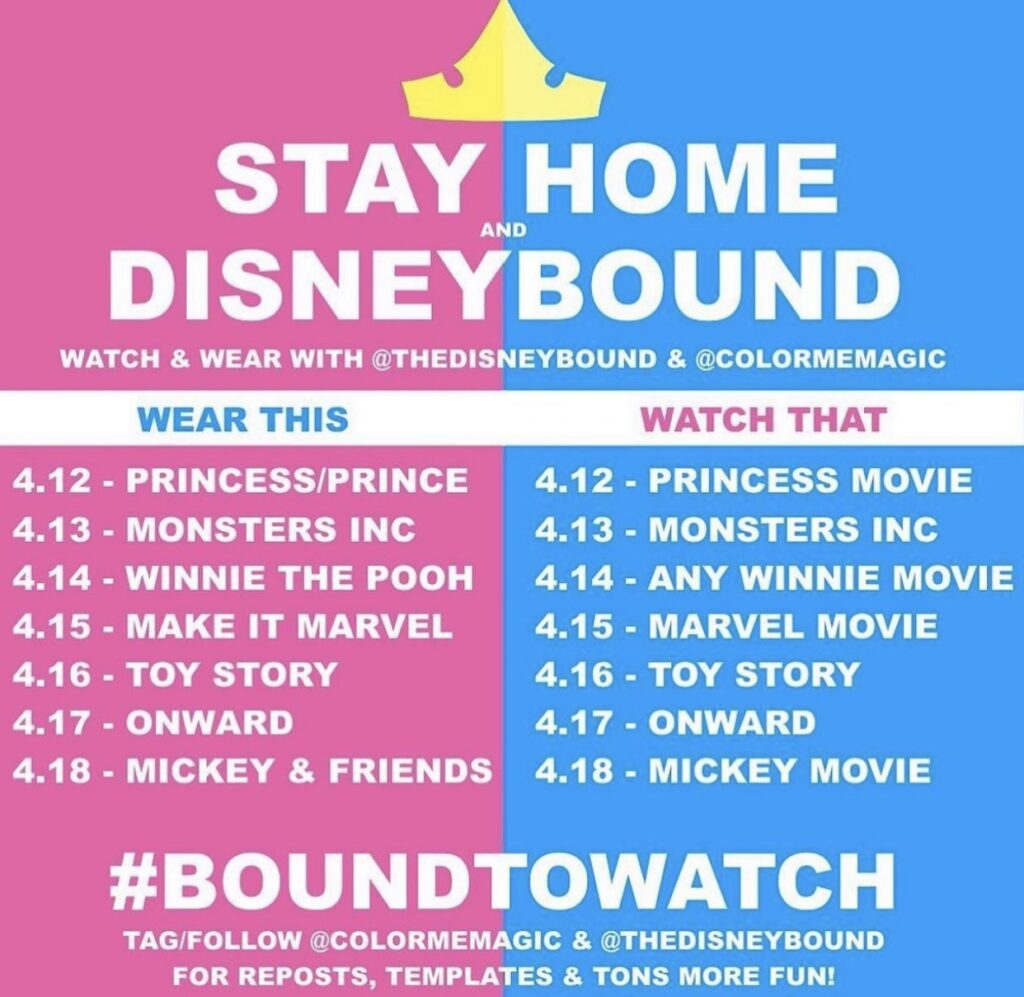
For it to be successful, you need a theme! The Disney Bound Challenge’s theme is always (you guessed it) Disney bounds! My themes have been tied to holidays; we did costumes for #colormehalloween and valentine themes for #colormevalentine. More recently, with #boundtowatch we did stay at home Disney bounds to keep people entertained during quarantine and give them fun movie prompts for watching!
STEP 2: PICK A NAME AND HASHTAG
Pick a name & hashtag, make sure its available and makes sense. I usually brand mine to my name! I would not recommend using the word “Disney” in your social media challenge name because you do not own that name, Disney does.
STEP 3: CO-HOSTS? FEATURED CREATORS?
I do think having a co-host can help, challenges are A LOT of work so it takes some work off the plate. I do not recommend doing a 3 person co-host challenge. For #colormevalentine I did a new co-host daily and that was really successful because it gave the program maximum exposure and allowed me to work with so many creators, but I still did the heavy lifting in planning and organizing so there was never any clashing on that front or mixed messaging.
STEP 4: MAKE A GRAPHIC
Make a graphic for your social media challenge, throughout this post you’ll see some I’ve used. I make mine in Keynote. For each one, I usually make 1 in a square, 1 in a 4:5 and 1 for stories. Here’s why: you’ll post the square solo to your feed (not a 4:5 bc this will get cropped in your feed grid), I use the 4:5 as a swipe right because I usually post 4:5 photos in my feed & you’ll use the story size (9:16) for when you promote to stories

STEP 5: ANNOUNCE
Graphic made, challenge organized, co-hosts selected? okay time to announce! You should do this 15-10 days before your challenge, 5 days before your challenge, and again the day before or the last post before your challenge starts. On stories you should post 7 days out, 3 days out, and 1 day out. Of these feed posts at least once needs to be a solo post in your feed, no pretty photo, and then a swipe right, sorry. I usually make sure my second 2 posts (5 days before and the day before) are these kinds of solo posts. They will not perform well! No one wants to like a post like that, but it’s important for your challenge. So swallow your pride and post a photo that gets 100 likes, you’ll also notice it gets a ton of shares and reposts, maybe even some comments tagging new people to see the challenge and your account.
That is why this matters. Challenges will bring lots of new eyes to your page, eyes who didn’t see post 10 or post 5 in your feed, and will never be able to find your “announcement” post unless they go back through all your old posts and swipe right …. not going to happen. SO instead you need to make sure your last post before your challenge content starts is your graphic, this will essentially “launch” the challenge and help any new eyes coming to your page catch up. << Failing to do this is probably the #1 mistake I see being made with new challenges!
STEP 6: RALLY SUPPORT
After you post 10 days out announcing, draft a list of creators you want to work with or have in support of the challenge. Send them DMS and ask if they want to be involved! Be fair, and kind and make sure you’re proving them value in exchange for the value they are bringing to you and your challenge. A lot of people will just share it without asking for anything in return, but if you’re out there asking for a favor, please be kind and return it
STEP 7: CONTENT PLAN
The week of the challenge is going to be wild, make sure you have all your content planned out. shot & edited a few weeks before. Your captions & stories too!
STEP 8: POST & REPOST
Okay now you’ve posted, promoted & you have a solo photo in your feed the night before your social media challenge starts …. it’s gone time! Post each of your photos as easy as you can every morning, I usually opt for 8 AM. Then every night or afternoon you should really repost other images from the challenge. This will never perform as well, but it’s the kind thing to do. You asked people to post on your behalf the very least you can do is promote those accounts. I find them by taking screenshots as I engage (next step) and then add those carousels to your feed as a post. I usually upload the photos so I can see the account name, then go into Instagram & add the tag, then go back and edit the crop to remove the name. This helps ensure I tag correctly! I also usually draft x2 posts for each challenge prompt. One to use as my opening AM post and one to use for the start of the carousel to ensure everyone is included fairly
STEP 9: ENGAGE
After you post your AM post, you need to spend some time authentically engaging on the other creators posting under the hashtag. Repost these to stories, like & comment on as many as you can. I usually spend x2 hours a day during a challenge doing this. Again, people are participating in your social media challenge, you need to spend some time supporting them the way they are supporting you
STEP 10: THANK YOU
Repeat steps 8 & 9 daily until your challenge ends and at the end be sure to do one big thank you post acknowledging all the work and creativity that was done by your community! This could be in your final round-up post on your final day or a separate post, but this is essentially your virtual thank you note for everyone who came to your party and gave you a present. Don’t be rude, send them a thank you!
OKAY I HOPE THIS HELPED!!! if you need very real physical examples to check out my old challenges to see how I’ve done this, #boundtowatch, #colormeparkhopper #colormehalloween, and #colormevalentines
OH and if you have an upcoming challenge don’t forget to submit to the Magic Bulletin Board
SHARE OR SAVE FOR LATER
Hey girl hey..
I’m Courtney - a bright minded New Yorker with a serious sweet tooth a slight color obsession ;). Welcome to my world (and wardrobe) where I mix my matches, live colorfully & always dress outside the lines ! learn more >>
Browse by Category
<!– COLLECTIVE WIDGET CODE START
–>
<!– COLLECTIVE WIDGET CODE END
–>
Press Play


Comments